Facebook

31 Jul 2019

The Dieppe Raid: The Combined Operations Assault on Hitler's European Fortress, August 1942

The Dieppe Raid: The Combined Operations Assault on Hitler's European Fortress, August 1942

Winston Churchill was under pressure. The Soviets felt that they were fighting the Germans by themselves. Stalin demanded that Britain should open a second front to draw German forces away from the east.

Though the advice Churchill received from his staff was that an invasion of France would not be possible for at least another year, the British Prime Minister knew he had to do something to help the Russians. The result was a large-scale raid upon the port of Dieppe.

It would not be the second front that Stalin wanted, but at least it would demonstrate Britain s intent to support the Soviets and it would be a useful rehearsal for the eventual invasion. Dieppe was chosen as it was thought that the success of any invasion would depend on the capture of a major port to enable heavy weapons, vehicles and reinforcements to be landed in support of the landing forces. After an earlier postponement, the raid upon Dieppe,

Operation Jubilee, was eventually scheduled for 19 August 1942. The assault was the most ambitious Allied attack against the German Channel defences of the war so far. Some 6,000 infantry, 237 naval vessels and seventy-four squadrons of aircraft were involved. Though the debate surrounding Jubilee s purpose and cost has raged in the years since the war, many vital and important lessons were learnt.

All of these factors are covered in this official battle summary, a detailed and descriptive account of the Dieppe Raid, which was written shortly after the war and is based on the recollections of those who were involved.

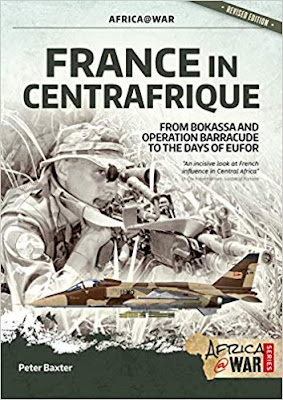
France in Centrafrique: From Bokassa and Operation Barracude to the Days of Eufor

France in Centrafrique: From Bokassa and Operation Barracude to the Days of Eufor

France in Centrafrique explores the early colonial and post-colonial history of French Equatorial Africa with a particular emphasis on the role of the Central African Republic in the Second World War and the Free French Movement.

One of the key figures to emerge from this period, and a man who would shape the modern destiny of the Central African Republic, was Jean-Bédel Bokassa. Bokassa served alongside the Free French under General Charles de Gaulle and later in the metropolitan French military as an NCO in Indo-China.

The narrative traces his ascent from these humble beginnings to his position as one of the region’s most notorious dictators, exploring both his excesses of violence and personal aggrandizement and the role played by France and the wide-reaching Foccart intelligence network in his rise and fall. Baxter examines the past and present relationship of France with her erstwhile African colonial possessions, giving substance to the cause and effect of the many French interventions and the play of various individual personalities, both French and African, and how this has affected the current complexion of the region and its ongoing relationship with France.

The book traces the overt and covert French military actions in the region, the rise of internal violence and insecurity and the increasing involvement of the international community in the series of coups and counter-coups that characterized the 1990s and the new century.

Featured are Operation Barracuda, Operations Almandin I, II and II, Operation Boali and the various regional, international and European regional interventions.

The Last Spanish Armada: Britain and the War of the Quadruple Alliance, 1718-1720

The Last Spanish Armada: Britain and the War of the Quadruple Alliance, 1718-1720

Overshadowed by the better known Spanish Armada of 1588, three centuries ago, the final Spanish Armada set sail against England and Scotland.

This little known invasion is often treated as part of the little known Jacobite campaign of 1719. However, this invasion and the subsequent campaign in Scotland were part of the virtually unknown War of the Quadruple Alliance.

This conflict has never been hitherto covered in a book in the English language. This book is a study of war and diplomacy involving several of the European powers, with fighting on the high seas, in Scotland, Spain, Sardinia, and Sicily.

It is a tale of a once great power taking advantage of apparently favourable international circumstances to regain parts of its lost empire. Success seemed possible, but the fortunes of war are fluctuating and luck only goes so far.

Eventually the realities of military power reasserted themselves with bloody results. This book presents an account of this little known war.

The emphasis is on Britain’s naval, diplomatic and military efforts, whilst not neglecting those of its allies and enemies, both abroad and at home. It draws on a variety of little or unused primary sources held at the National Archives and elsewhere and boasts a cast of interesting and unusual characters.

Chaos in the Sand: A History of XIII Corps at Alamein. The Southern Sector, October and November 1942

Chaos in the Sand: A History of XIII Corps at Alamein. The Southern Sector, October and November 1942

After the protracted and bloody battles in the Gazala Line, May/June 1942, the defeated Eighth Army was in full retreat towards the positions at Alamein.

Here the Eighth Army licked its wounds and replenished its stocks of men and materials. Montgomery was appointed as the new commander and instilled into his troops a new air of confidence.

Most studies of Alamein focus on the northern coastal sector where the main action was fought. This study looks at the southern sector held by XIII Corps: 50th Northumbrian Division, 1st Greek Brigade under its command. 44th Home Counties Division and the 7th Armoured Division with 2nd Free French Brigade under its command.

Though the fighting here was not on the same scale as the coastal sector it was nonetheless a series of bloody actions and hundreds of men perished. XIII Corps had the job of holding on their front German and Italian armoured divisions that would otherwise be sent north to impede the main attack by Eighth Army. After the first attacks in the north and south failed to break through the Axis forces Montgomery organised Operation Supercharge, a thrust in the north headed by infantry and artillery.

151 [Durham Brigade] was moved north to take a leading role in this attack in early November. After a bloody fight the Durhams and Scots troops broke through and the British armour streamed out into the desert as the Axis forces retreated.

1/144 Mirage 2000 Cockpit Detail Set from RetrokiT

Time to get started on a long-awaited project, a 1/144 Mirage 2000 cockpit detail set!

Mirage 2000 Cockpit Detail Set

Mirage 2000 Cockpit Detail Set

RetrokiT

Show Your Painted Miniatures from Spellcrow


If you would like to show your painted Spellcrow miniatures on our website, feel free to send us pictures of them.
Spellcrow

First mould is baking from Traders Galaxy

First mould is baking

Basically just a master mould of the 4 non Duke starter Valiants as well as exclusive Broadsword and Reilsee.

Basically just a master mould of the 4 non Duke starter Valiants as well as exclusive Broadsword and Reilsee.

I need to make masters of these because i am production casting semi assembled

Trying to make life easier for you guys as always!

Production moulds tomorrow!

Traders Galaxy

Project Update #20: War Across Europe 3D Print STL files, Kickstarter from WOW Buildings

Project Update #20: War Across Europe 3D Print STL files, Kickstarter from WOW Buildings

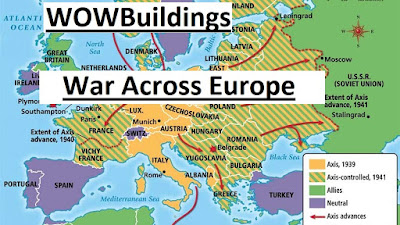
WOWBuildings War Across Europe 3D Printing stl Files.

Chateau Maltot adding as a stretch

Chateau Maltot adding as a stretch

Kickstarter
WOW Buildings

Project Update #19: War Across Europe 3D Print STL files, Kickstarter from WOW Buildings

Project Update #19: War Across Europe 3D Print STL files, Kickstarter from WOW Buildings

WOWBuildings War Across Europe 3D Printing stl Files.

New Stretch

Coal yard added, i will do a general accessories pack next for some signage and other stuff for scatter terrain objectives etc

Kickstarter
WOW Buildings

Québec Under Siege: French Eye-Witness Accounts from the Campaign of 1759

Québec Under Siege: French Eye-Witness Accounts from the Campaign of 1759

Late in the summer 1759, Québec, the capital of New France, was under siege. British Major General James Wolfe had the city surrounded and cut off from reinforcements in Montréal, Vice Admiral Charles Saunders was in firm control of the rivers surrounding the city as well as the supply routes into the region.

The French population found itself low on food and ammunition to defend themselves, and suffering daily bombardment by the English. The walls of Québec were manned by militiamen and sailors taken from French ships lost or anchored above the city for their protection. Lieutenant Général Louis-Joseph de Montcalm-Grozon and his aide-de-camp Louis-Antoine de Bougainville commanded the French regulars outside the city, moving them in rapid deployments to counter the British advances.

Here the story is told by the citizens within the walls: an artillery captain, a prominent citizen, the emissary traveling between the British and the French commanders, and a Catholic nun working in the main hospital, treating the sick and wounded of both armies. Three of these works are offered in English for the first time, and all four are fully annotated.

These journals and memoirs bring us inside the siege, allowing us to watch through their eyes as the fate of New France was determined.

30 Jul 2019

Andrzej Pryzowicz Sent Pictures from Spellcrow

Our friend Andrzej Pryzowicz sent us some cool pictures with painted 10mm Argatoria miniatures Andrzej assembled the Giant with a 2nd version of head and gave him the 2nd version of hands as well. Hope you like his works

Andrzej Pryzowicz


Spellcrow

29 Jul 2019

BattleTech: Alpha Strike: Commander's Edition

BattleTech: Alpha Strike: Commander's Edition

Command Your Destiny

BattleTech: Alpha Strike: Commander's Edition, In the BattleTech universe there remains one constant: the drums of war. And where there is war, valiant military commanders from the Great Houses, the Clans, and other interstellar nations lead the charge of hulking BattleMechs, brave infantry, and daring aerofighters to certain victory or crushing defeat on the sprawling battlefields of distant worlds. Rally your troops onward into the fray, and surge forth to triumph over the enemy.

Alpha Strike: Commander’s Edition collects into one handy volume the revised fast-play rules from the original Alpha Strike and the expanded rules from Alpha Strike Companion. Take command of large-scale engagements with tabletop-miniatures gameplay designed for the modern wargamer. Use the force-creation rules to marshal your armies, charge them into battle, and either reap the rewards of conquest or taste the bitter pill of defeat. The future of the Inner Sphere is in your hands!

Wargame Vault

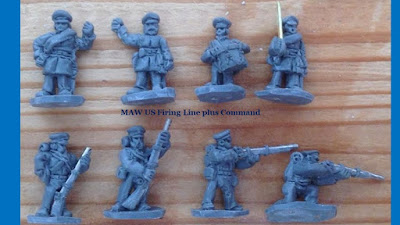
US Firing Line & Command from Good Ground LLC

On the way to our casting company US Firing Line and Command.

So Far From God

US Firing Line and Command

US Firing Line & Command

Good Ground LLC

28 Jul 2019

Sd.Kfz 251 - Upgrades and Additions from Pendraken Miniatures

The new releases continue at a pace and this time we've upgraded our Sd.Kfz 251 models and added some extra variants as well!

First off, our existing Ausf C and Ausf D hulls have been upgraded, along with their variants, so all of the current codes have been replaced with these new models.  Where necessary, we've also replaced the additional items, so new rocket launchers, new map tables, etc. 

As well as those upgrades, we've also taken the opportunity to add the Ausf A and Ausf B versions, along with the most popular variants across all of the B C and D hulls.  Most of these options are separate castings (rockets, guns, mortars, etc) so we can put together some of the less popular versions if anyone wants them.

WWII German Vehicles

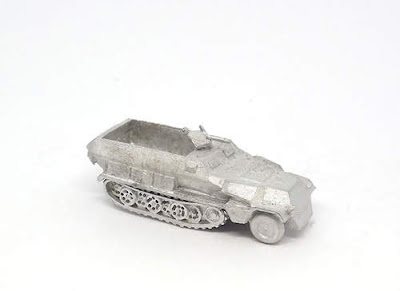
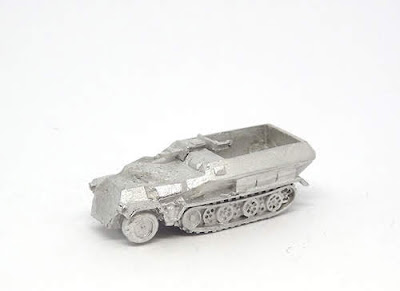
GRV57   Sd.Kfz 251/1 (Ausf C)

GRV57   Sd.Kfz 251/1 (Ausf C)

GRV58   Sd.Kfz 251/1 (Ausf C) camouflaged
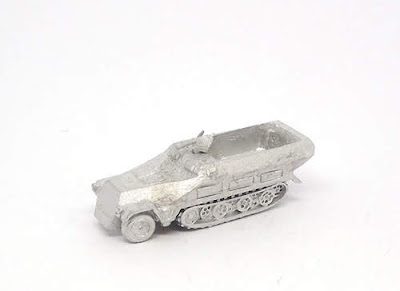
GRV59   Sd.Kfz 251/1 (Ausf D)

GRV59   Sd.Kfz 251/1 (Ausf D)

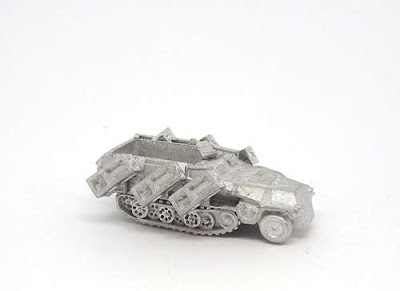
GRV60   Sd.Kfz 251 (Ausf C) ‘Wurfrahmen 40’ rocket launcher

GRV60   Sd.Kfz 251 (Ausf C) ‘Wurfrahmen 40’ rocket launcher

GRV61   Sd.Kfz 251/2 (Ausf C) 8cm mortar carrier and crew

GRV61   Sd.Kfz 251/2 (Ausf C) 8cm mortar carrier and crew

GRV62   Sd.Kfz 251/3 (Ausf C) with frame aerial

GRV62   Sd.Kfz 251/3 (Ausf C) with frame aerial

GRV63   Sd.Kfz 251 (Ausf C) with map table and officer

GRV63   Sd.Kfz 251 (Ausf C) with map table and officer

GRV64   Sd.Kfz 251/7 (Ausf C) engineer vehicle

GRV64   Sd.Kfz 251/7 (Ausf C) engineer vehicle

GRV65   Sd.Kfz 251/9 (Ausf C) short 75mm

GRV65   Sd.Kfz 251/9 (Ausf C) short 75mm

GRV66   Sd.Kfz 251/10 (Ausf C) 37mm AT

GRV66   Sd.Kfz 251/10 (Ausf C) 37mm AT

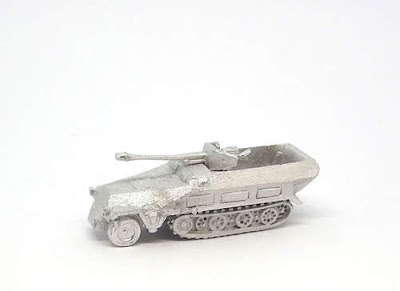
GRV67   Sd.Kfz 251/22 (Ausf D) 75mm AT

GRV67   Sd.Kfz 251/22 (Ausf D) 75mm AT

GRV68   Sd.Kfz 251/8 (Ausf C) ambulance with tilt

GRV68   Sd.Kfz 251/8 (Ausf C) ambulance with tilt

GRV69   Sd.Kfz 251/16 (Ausf C) Flammpanzerwagen

GRV69   Sd.Kfz 251/16 (Ausf C) Flammpanzerwagen


GRV112   Sd.Kfz 251/1 (Ausf A)


GRV113   Sd.Kfz 251/1 (Ausf B )

GRV113   Sd.Kfz 251/1 (Ausf B )

GRV114   Sd.Kfz 251/2 (Ausf B ) 8cm mortar carrier and crew

GRV114   Sd.Kfz 251/2 (Ausf B ) 8cm mortar carrier and crew

GRV115   Sd.Kfz 251/2 (Ausf D) 8cm mortar carrier and crew

GRV115   Sd.Kfz 251/2 (Ausf D) 8cm mortar carrier and crew

GRV116   Sd.Kfz 251/7 (Ausf D) engineer vehicle

GRV116   Sd.Kfz 251/7 (Ausf D) engineer vehicle

GRV117   Sd.Kfz 251/9 (Ausf D) short 75mm

GRV117   Sd.Kfz 251/9 (Ausf D) short 75mm

GRV118   Sd.Kfz 251/10 (Ausf D) 37mm AT gun

GRV118   Sd.Kfz 251/10 (Ausf D) 37mm AT gun

GRV119   Sd.Kfz 251/16 (Ausf D) Flammpanzerwagen

GRV119   Sd.Kfz 251/16 (Ausf D) Flammpanzerwagen

GRV120   Sd.Kfz 251 (Ausf D) ‘Wurfrahmen 40’ rocket launcher

GRV120   Sd.Kfz 251 (Ausf D) ‘Wurfrahmen 40’ rocket launcher

GRV121   Sd.Kfz 251/1 (Ausf D) camouflaged
(All packs contain one vehicle, priced at £2.95)

Next it's the big one, Indian Mutiny incoming!  We just need to blackwash and photograph about 200 figures and we're good to go!

Forum Discussion
Pendraken Miniatures

Project Update #18: War Across Europe 3D Print STL files, Kickstarter from WOW Buildings

Project Update #18: War Across Europe 3D Print STL files, Kickstarter from WOW Buildings

WOWBuildings War Across Europe 3D Printing stl Files.

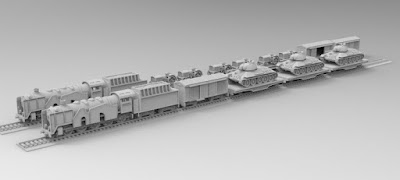
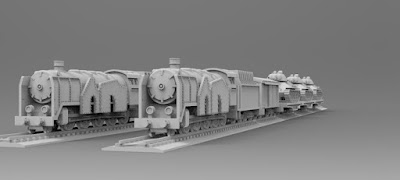
Train WIP the rolling stock is coming along

rolling stock picture 1

rolling stock picture 2

Kickstarter
WOW Buildings

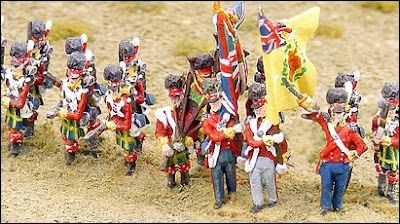
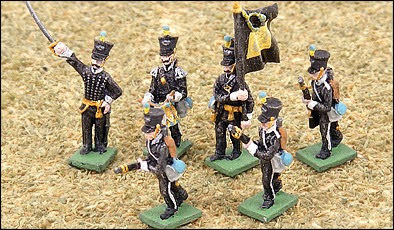
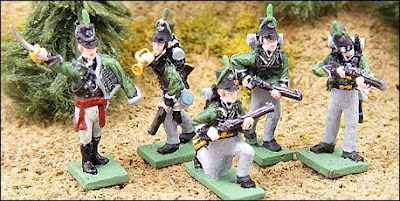
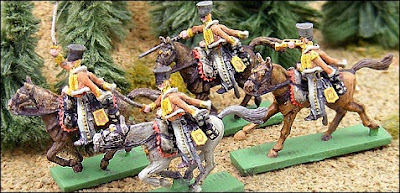
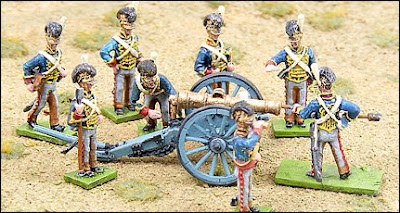
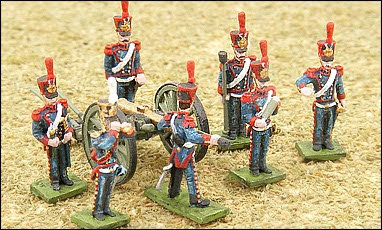
New GHQ 10mm Napoleonic Pictures Magister Militum

New GHQ 10mm Napoleonic pictures up! They compliment our own 10mm figures too.

GHQ 10mm Napoleonic

GHQ 10mm Napoleonic picture 1

GHQ 10mm Napoleonic picture 2

GHQ 10mm Napoleonic picture 3

GHQ 10mm Napoleonic picture 4

GHQ 10mm Napoleonic picture 5

GHQ 10mm Napoleonic picture 6

GHQ 10mm Napoleonic picture 7

GHQ 10mm Napoleonic picture 8

GHQ 10mm Napoleonic picture 9

GHQ 10mm Napoleonic picture 10

GHQ 10mm Napoleonic picture 11

Magister Militum

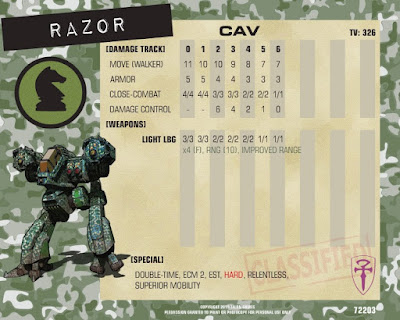
Malvern's Razor from Talon Games

The Malvern's Razor, as originally designed never really felt like a "recon" CAV. So I put on my engineer hat today to see if we can fix it up a bit.

The Malverns have a lot of Razors due to their simple design, one which it based on a modular system to allow for quicker repair and to change its configuration for a specific mission-type.

The Razor (V1) is a recon model with an improved power system allowing it to carry more armor as it is designed to deploy with larger field superiority CAVs to improve overall targeting acquisition.

The Razor (V1)

The Razor (V2) is an assault CAV to be used as part of a lighter, fast reaction force or provide close in protection for a fire support squad, with its guided missiles giving it decent stand-off capabilities and maintain maximum speed at all times.

The Razor (V2)

Both cards are now up at cavhq.com and will be in the new CAV CP update coming in August.

Looking for a great little starter Attack Squad for the Malverns? Take this 2467 point force out for a spin...
Wight
Wight
Assassin
Specter B
Razor V2

Talon Games